
To Read The Full Article, Go To www.cyclesource.com
X Gets A Six In to Four For Patience
Article By: Xavier Muriel
Originally Published In The July 2018 Issue Of Cycle Source Magazine
They say “Better late than never’’ right? Well, here I am a lil tardy, but I always do my best to keep my commitments. So here goes, this month I promised Baker Drivetrain that I would do an install tech article on their bitchin’ 6-into-4 transmission that they so graciously helped me with for my “In Motion” build last November. Yep, when I said I was little tardy, I wasn’t kidding.
Now, if you know anything about anything Bert Baker, you know he has revolutionized the industry in so many ways that to single out only this transmission would be blasphemy. The 6-into-4 came on the scene in the early 2000’s when guys like Indian Larry and other Discovery Channel build off guys were dazzling us week after week with their amazing builds. The beauty of this tranny is that it incorporates ALL of the latest technology but still retains that old school look that most guys like to use. It can be ordered to your exact specs, you can choose everything from case texture, gear ratios, standard kicker or hydraulic version, and the coolest thing I did is the N1 shift drum. This allows the rider to have neutral all the way down as opposed to in between 1 and 2 gears like standard shift patterns. So, for the jockey lover this thing makes riding a whole lot easier. Everything that goes into a Baker transmission is of the highest quality because Bert is a true believer in keeping everything American Made and doing so in Haslett Michigan. There’s no skimping here I can tell ya that. He holds his products to the utmost standard. If you’re not familiar with Bert or Baker Drivetrain I highly suggest you take a look for yourself. You can see all the goodies at Bakerdrivetrain.com
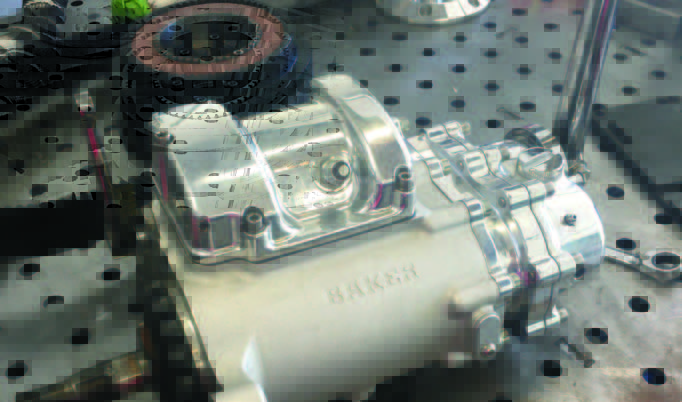
For this install, I chose a 6-into-4

with a natural case, N1 shift drum and a polished Hydraulic kicker end cover. Please note, that because I went with the Hydraulic End Cover Conversion a 11/16 Master Cylinder must be used. Let’s get to it shall we!

FIRST OFF…. Read the directions, find out what tools you’ll need. SECOND inspect the package to make sure all the parts are there.

The tranny comes from Baker with the 4 studs already in place for a stock inner primary set up. Since I’m going with a Tech Cycle Isolator series 2’’ open belt set up, those 4 studs will have to be removed. Now, there’s a few correct ways to do this and ALOT of awful ways. The preferred method and how I was instructed by the guys who know what’s what, is Heat! The studs are heated carefully so as to break the fastening agent that’s used during assembly. Then by screwing two nuts on to the stud and tightening them back to back, creating a jam nut, you can simply unscrew the stud efficiently and without damage to any other components.
Once all studs are removed be sure to clean up any residual locking agent from the holes, so that the next set of bolts screws in with no hassle.

Next, we move onto the tranny plate. Since this is a 4-speed style case I’ll be using an adjustable 4-speed plate. The plate has four slots for the tranny case lower mounting studs to go through, the two rear slots are your adjustable ones. They are actuated by two recessed Allen bolts at the rear of the plate. This allows the tranny to be moved backwards and forwards for proper primary belt tension.

The tranny MUST be mounted to the plate first and the adjuster bolts MUST be facing the rear of the motorcycle. Using proper hardware, the 4 case studs are placed through each aligning slot and the case is secured to the plate. At this point, just snug these nuts down. They will need to be loose in order to align and tighten the tranny later. Now the tranny with plate attached can be placed gently into the frame. The plate has 4 holes that will align with those on the frame as well as the 5th stud on the bottom of the case that will go through the slotted boss on the frame (make sure there is no space in between the case and frame, if so shimming may be necessary).

The plate can now be secured to the frame, the rear mounts will thread into the frame mounts. A little Red Loctite here would be a good idea. The front mounts will be nuts and bolts (always use new Nylock nuts if that’s your preferred fastener). Now the tranny is in place and ready

for the next step. This all depends on whether you are using a stock set up (which is why I suggested that you read the instructions, there may be some additional steps needed) or an open belt drive of your choice. Moving the tranny case to the most forward position will ease the installation of the front pulley, belt and clutch basket. Once these are on and fastened securely, you can then adjust the belt tension by turning the Allen screws located at the back of the plate equally and slowly clockwise, pulling the tranny case back to the desired tension. Once the belt tension is acquired, return

to the studs at the bottom of the tranny case and torque them down equally as per instructions

With the transmission torqued down the 5th bolt mount can be addressed. Often times this mount will need a shim between the transmission and the frame mount. If no shim is needed make certain that the base of the transmission is flush against the plate. If the frame was made incorrectly and the fifth bolt mount is too high, then the transmission will not sit flush on the plate. If you encounter this unfortunate scenario then you must back up and shim the transmission plate in order to clear the fifth bolt mount. It is always best to shim the gap at the fifth bolt rather than putting undue stress on the transmission case.

As with all installs take your time, patience will always keep you from screwing something up, trust me on this! Now it’s ready for the belt drive of your choice and many miles of happy smooth like butta shifting. I’ve never had a tranny this amazing before and man I gotta tell ya it’s a looker as well as a work horse. Many, thanks to Bert, Michelle and all the great folks over at Baker Drivetrain for such an amazing product and all the support they offer… Happy Shifting……


