


Article By: Daniel Donley – Pandemonium Custom Choppers
Originally Published In The February 2019 Issue Of Cycle Source Magazine

So, it’s winter here and the wonderful Midwest that means it’s cold. When I got to the shop on Monday and realize dam, it’s cold in here, only to find out the furnace quit working! After making a few phone calls to furnace repairman, they all tell me it will be at least two weeks or more before they can be out to take a look. Well, I can’t go that long without heat, so I head into town to try to find some alternative heat for the shop when I see the local pawn shop. I figured why not stop in to take a look, see at what they have. Well, low and behold they had a salamander kerosene heater with a “does not work $25 tag” on it. After handing over $20, I loaded it up and brought it to the shop. We’ll try to figure out what’s going on with this thing and see if we can get some heat going. For this month’s tech, I’m going to show you how to repair a salamander type kerosene heater. Heaters like this are commonly used by a lot of guys in their garages for heat while working on their projects. To start, I’m going to go over the basics of how one of these salamander type kerosene heaters work. With the unit plugged in, an electric fan motor blows through a chamber, on the back side is a Vane style pump; this produces air which travels to a nozzle. This nozzle is also connected to the fuel supply when air passes through the nozzle it creates a Venturi effect, sucking fuel from the tank. Fuel is then sprayed and then ignited by a lighting mechanism. A flame is then achieved and a photoeye senses that there has been combustion which then monitors it to keep it within safe parameters.

I’m now back at the shop with my pawn shop score! Hopefully, this thing will be making heat soon, because it’s cold in here! I figured I’d start with the basics. I removed the fuel cap to make sure that the vent is not clogged. I then use a flashlight to check to see if there is

any debris in the fuel. And, of course, it’s pretty dirty and had a weird smell. I removed the old fuel and cleaned out the tank. I then added fresh kerosene. Hopefully, this will work! I plugged the unit in and Bam; it roars to life! I was thinking to myself this is awesome! About 20 seconds later it shut off. Okay so oh, well I guess it’s not going to be that easy. Time to tear into it and see what the real problem is.

So, it’s time to tear into this thing and see what’s happening. I then remove the cover, just a few screws. I noticed

immediately that the airline and fuel lines are badly dry-rotted. I did a soap/water pressure test to verify.

And sure enough, the lines need replaced along with the fuel filter. The local welding store in town sells these units; they also have parts and accessories on hand. They were able to fix me up with everything I would need to get this thing going hopefully.

Onto getting this thing making some heat! I ended up purchasing a fuel / airline and a fuel filter along with a Vane pump filter housing, filter kit, and pressure adjusters, just in case. Replacement of these parts is very

straightforward, disassemble and then reassemble in the reverse order. The Vane pump filter kit is supposed to be serviced yearly. While I had this apart, I also made sure that the motor and Vane pump turn freely by hand. If this were to turn hard, this

would be an indication that the motor or vane pump would need attention. The Vane pump housing has the two yellow fittings; one is pressure port

for installation of a gauge. The other port is for pressure adjustment which contains, a spring and ball to release excess pressure. This adjustment is

very crucial on the performance of the machine! The amount of pressure affects the amount of fuel. Typically when you have a salamander heater that only runs for 20 to 30 seconds and then shuts off it is an indication of an air leak. An air leak will create a lean mixture. The photo-eye is sensing the wrong color of flame, lean. The photo-eye can also pick up on a rich condition and shut the machine down. This is all for safety.

Next, I installed a new airline from the vane pump to the fuel mixer. Then a

pickup line from there to the fuel tank and the addition of a new fuel filter. Glad we’re getting close my fingers are getting cold! Now to adjust the vane pump

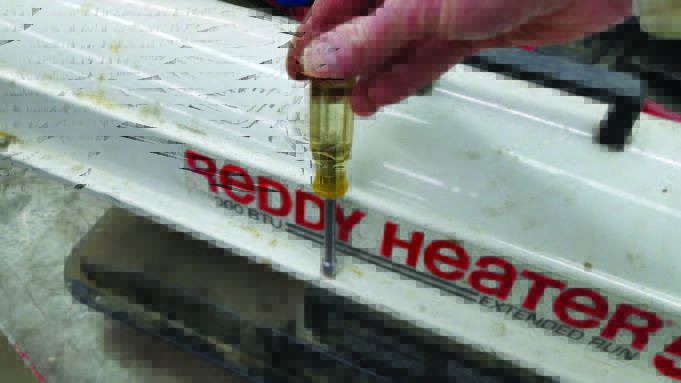
pressure. On older machines, you can adjust this by smell. On the newer machines, it is necessary to use a low-pressure gauge, 10 PSI and under. The photo-eye constantly monitors the color of the flame, and if the pressure is not adjusted correctly, it will shut the machine down. The PSI specification is located on the side of the machine on the data plate. Now attach the pressure gauge to the pressure port. Turn the machine on; then you can adjust the pressure relief with a large screwdriver to achieve proper vane pump pressure: clockwise more pressure, counterclockwise less pressure. Once you achieve this, turn the machine off and remove the pressure gauge and install the pressure port plug. You may have to do this a few times before you get it dialed in correctly. We now have heat! Hallelujah! Since it’s 17 degrees outside! The little salamander has been working great! Parts are affordable for these machines and they are fairly easy to work on once you understand them. Don’t be afraid to buy one that doesn’t work, if you can find it at a good price. I ended up with less than $50 in this little heater! But with the price of kerosene $4 a gallon, that repairman can’t get here soon enough! This year is my 7th year writing for Cycle Source and my 95th tech article so If there is something that you would like to see me do a Tech article onlease call me or email me with your idea! If you have any questions, please feel free to call me at the shop anytime 419-576-6812

Daniel Donley Pandemonium Custom Choppers
Facebook- Pandemonium Custom Choppers
Instagram – pandemoniumc2
info@pandemoniumc2.com
www.pandemoniumcustomchoppers.com


