


Article By: Will Ramsey – Faith Forgotten Choppers
Originally Published In The April 2013 Issue Of Cycle Source Magazine
This tech article is intended to be an introduction and simplification of selecting and preparing a tungsten electrode for welding. There are a lot of guys (and some gals) out there just starting to mess around with their new TIG welders. Hopefully this tech will help you get started on the right foot and avoid some of the common mistakes made when grinding an electrode. As always please feel free to give me a call with any questions you have. Will Ramsey – Faith Forgotten Choppers
Tungsten electrodes have additional alloying elements designed to improve performance. Each alloying element is designated by the color on the end of the electrode. (Photo 1) 2% thoriated (red) is the most common electrode and is traditionally used for steel. Pure tungsten (green – not shown) was traditionally used for aluminum welding. Since thorium is radioactive and pure tungsten just sucks, there has been a need to find other tungsten alloys
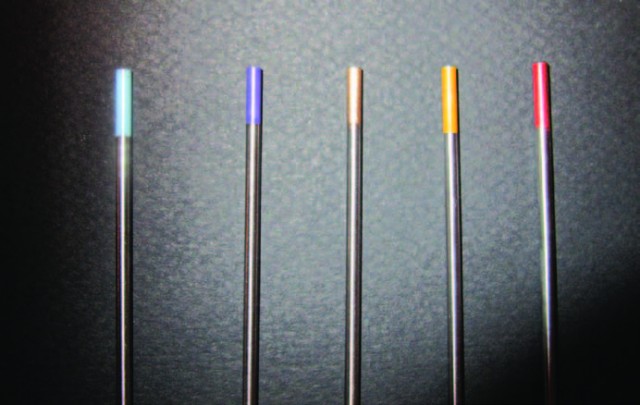
that are safer and perform better. This can all get a bit complicated and very expensive. My advice is to choose an electrode that works well for both AC and DC applications such as a hybrid (light blue) or lanthanated (gold) and call it a day.

(light blue) or lanthanated (gold) and call it a day. (Photo 2) Although tungsten electrodes can vary in diameter from .020” to 5/32”, nearly all of the welding performed in a
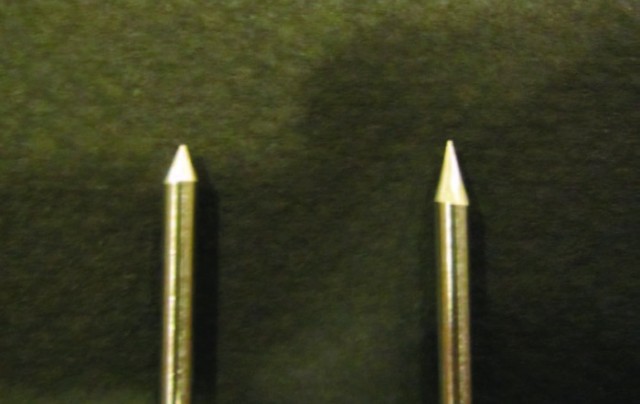
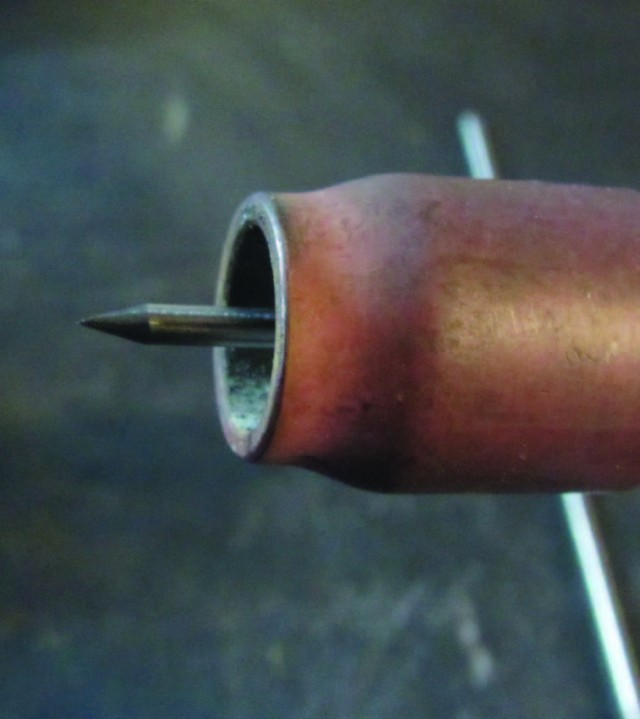
motorcycle shop can be accomplished with 1/16” and 3/32” tungsten electrodes. (Photo 3) A discussion of tungsten electrode geometry could get very complicated and is beyond the scope of this article. For most practical fabrication work you can simply use two grinds. The grind shaped like a pencil (right)is best for lower amperage jobs, like sheet metal, providing easy arc starts and reduced penetration. The grind shaped like a crayon (left) is best for higher amperage jobs, like welding frame tubing, because it increases penetration of the arc.
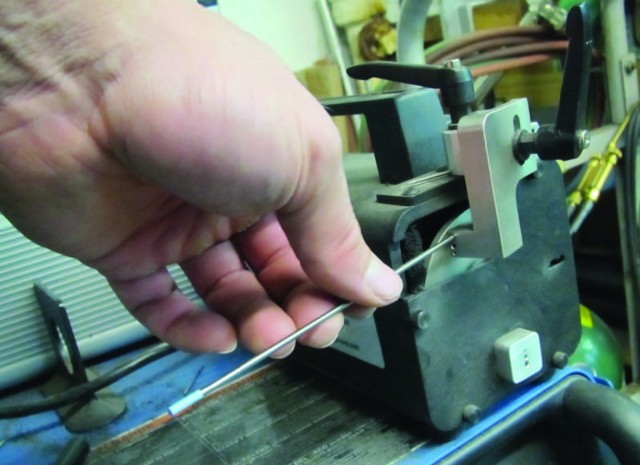
It is always best to have a dedicated grinder for grinding tungsten electrodes. This avoids contamination of the tungsten which can affect performance and introduce impurities into the weld puddle. The ideal grinder has a diamond wheel and an adjustable guide. This allows for clean and reproducible angles on the electrode.
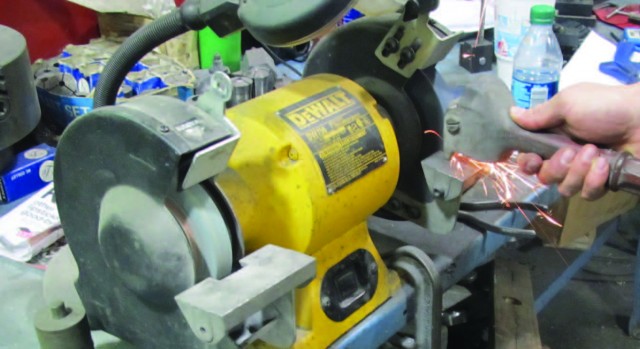
Unfortunately, these grinders can be a bit pricey for a garage shop. If a common bench grinder is to be used, it is important to dress the wheel before grinding a tungsten electrode. This will help eliminate some of the contaminants that the wheel picks up from other grinding procedures. A belt sander is not a good choice for grinding electrodes as there is no way to avoid contamination other than using a dedicated belt for tungsten grinding only.
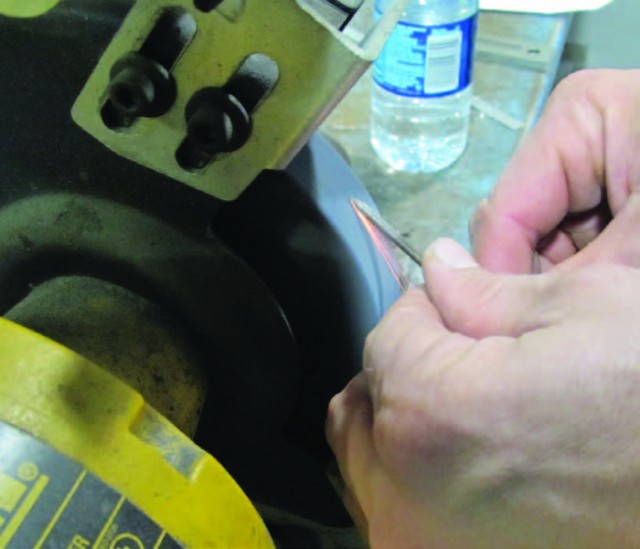
When grinding a tungsten electrode it is important to grind along the long axis of the electrode.
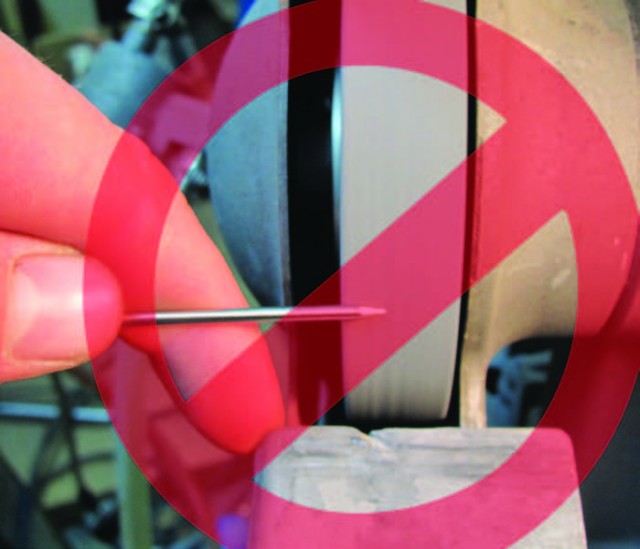
Never grind across the electrode! This will result in very difficult arc starts. In addition, the arc will tend to be unstable and wander all over the place.
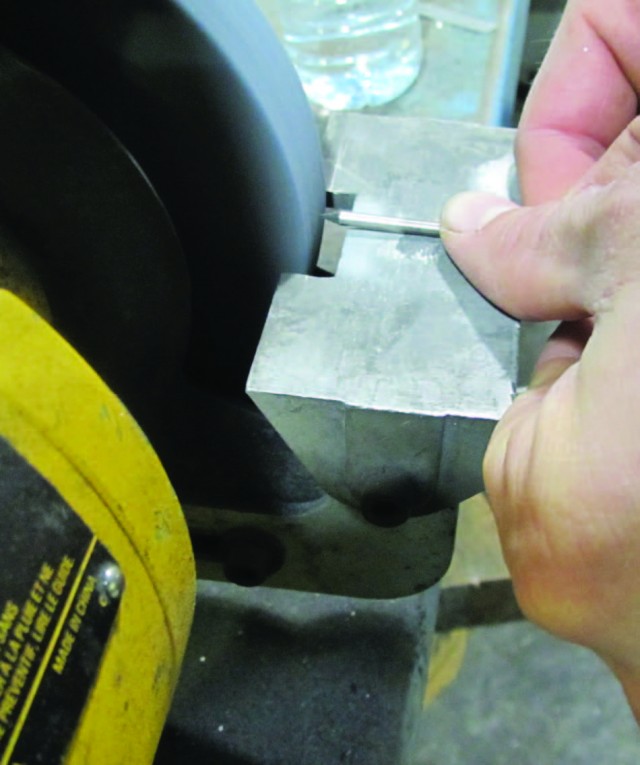
After grinding the taper it is advisable to put a small flat on the end of the electrode. This will keep the tip of the electrode from melting and contaminating the weld puddle. The size of this flat varies based on the amperage that will be used. If the flat is too large, it will be difficult to start the arc.
Position the electrode in the torch body, and now it is time to go to work!


