


Published In The December 2013 Issue
Article & Photos By: Will Ramsey www.faithforgottenchoppers.com

First off, I would like to apologize for my lack of tech articles over the last couple issues. I was super focused on completing the build for the Artistry in Iron show in Las Vegas last month and was unable to find time to write. Following the show, we decided to take a vacation in Southern California and spend some time riding. Before we could hit the road, I had a few final “service” jobs left to complete on the bike. So, I thought a DIY brake bleeding tech in my brother’s garage would serve as a great article for the home builders. There are many ways to bleed the brakes on a bike, and over the years I have tried most of them. There are also many gadgets (pumps… vacuums… etc.) sold to facilitate this process, and I own most of them. Like so many other jobs, I have found that simple is often better.
The process illustrated here requires nothing more than a syringe and a piece of clear tubing. The goal of bleeding a brake system is to remove all air from the lines so that the fluid can transfer pressure from the master cylinder to the caliper. In this closed system, air will always rise, so the relationship between the master cylinder and the caliper must be considered in order to choose an effective method. In the past, I simply attached a big vacuum to the bleeder and poured a bottle of fluid through the master cylinder. While this method works, I would like to present a less expensive method that simply requires a bit of finesse. Back bleeding a brake system (pumping fluid into the caliper through the bleeder) forces air out through the master cylinder. In the case of a front brake, once the fluid reaches the reservoir on the handlebars, the job is finished, since air rises as you fill the system from the lowest point. When bleeding the back brake, where the system tends to be aligned horizontally, it is often necessary to alternate pulling and pushing fluid through the bleeder in order to work all the pesky air bubbles out. In either case here is a simple and very efficient process for bleeding your brakes
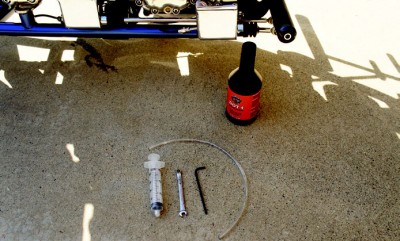
These are the only things I used for this job: 20cc syringe, 1/4” clear tubing, 1/4” wrench for bleeder valve, and an Allen wrench.
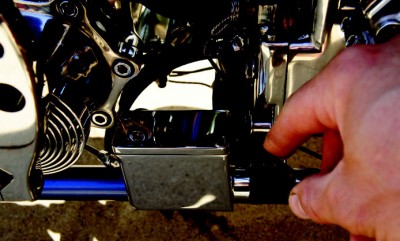
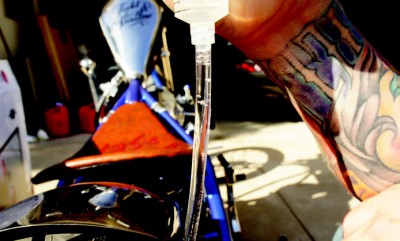
To get things started, simply remove the lid from the master cylinder.

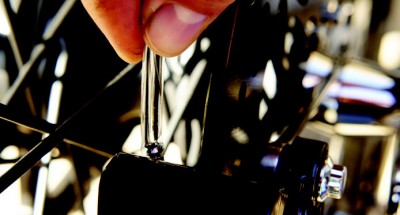
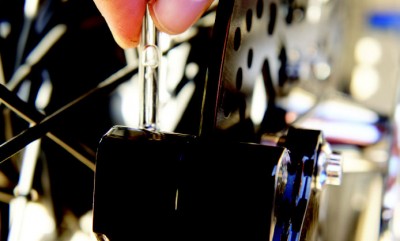
Using the appropriate wrench, remove the bleeder valve from the caliper.
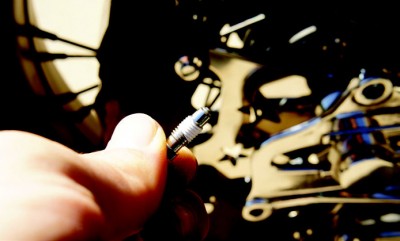
It is helpful to wrap the threads of the bleeder valve with a thread sealer in order to avoid air leaking into the system while the valve is open. Be sure to reinstall the bleeder valve back into the caliper before you misplace it.
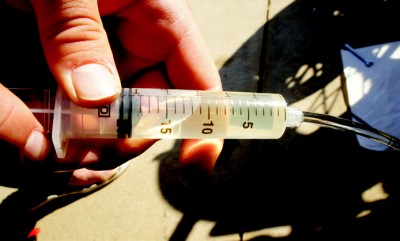
Draw up a syringe full of brake fluid. Dot 4 and Dot 5 brake fluid are most commonly used in our application. The choice of brake fluid is up to you (although it is often specified by the brake manufacturer). Just remember that the two fluids cannot be mixed, and Dot 4 will destroy a paint job.
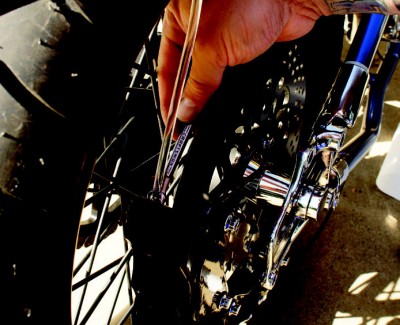
Make sure the bleeder valve is cracked and slide the clear tubing over the end of the valve. You want an air tight seal, so the tighter the fit, the better.
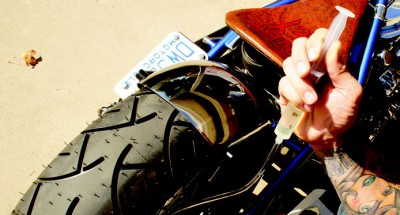
Using the syringe full of fluid, slowly depress the plunger to fill the brake system with the liquid. Take care not to force any air bubbles into the brake system (this would be counterproductive). If air bubbles are present in the line, simply wait for them to rise to the syringe. Take your time.
Continue back bleeding the system until fluid enters the master cylinder and fills about half the reservoir.
Air has a bad habit of getting trapped in brake calipers. By pulling back on the syringe plunger, remaining air is removed from the caliper. In some extreme cases the caliper may have to be removed from the mounting bracket and manipulated in order to release stubborn air pockets.
Remember, air bubbles will rise, so when pulling the plunger back be sure to allow the air bubbles to rise up the tubing away from the caliper. You can continue pushing and pulling fluid back and forth through the system to expel any remaining air. Just be sure not to suck air through the master cylinder (keep reservoir brake fluid level 1/4-1/2 full) or push air bubbles into the caliper.
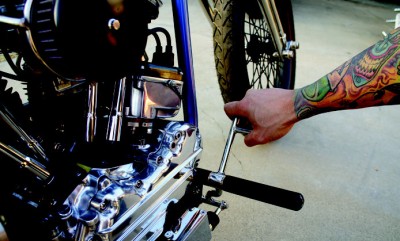
Using the appropriate wrench, close the bleeder valve. A couple pumps of the brake should reveal a solid air tight brake system.
So, as you can see, this is a fairly easy job if you just take your time. If you have any questions regarding this article or any of my other tech articles, feel free to contact me. will@faithforgotten. com


