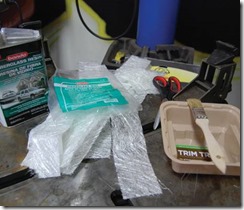
So you want to make a seat pan for your new chop, but don’t have the equipment to make one out of steel… then FIBERGLASS is for you. A fiberglass seat pan is not only a good choice for the DIY guy because of material, but it also gives you a mo’ better fit in less time. We decided to change the seat setup on “Dixie Wrecked” and went with a fiberglass pan. You can pick up all the materials you need at your local auto parts’ store. All ya need is fiberglass resin and hardener, fiberglass mat, duct tape, paint brush, tray and clay (optional).
Once the old seat is removed, use duct tape to cover entire area for new seat pan. The duct tape will also act as a tray to form your desired shape. You should make the pan tray larger than the actual finished product because you will trim for final shape.
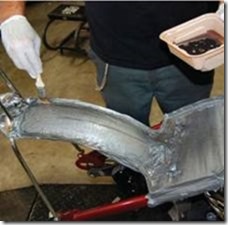
A ridge must be made around the perimeter of your seat pan tray in order to hold the fiberglass mixture in later steps. The ridge can be made one of two ways. You can use duct tape (above) or use clay. Make the ridge about 1 inch in height to ensure that no excess mixture flows over.
Next, mix fiberglass resin and hardener per instructions. Using a paint brush, apply a thin layer of resin in the seat pan tray, making sure to cover entire area. Be sure to not drip any excess on exposed parts and wipe away immediately if so.
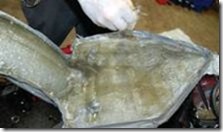
Once you have covered area with resin, take your fiberglass mat and cut it into 2 inch strips. Lay strips onto resin in seat pan tray, making sure to cover the entire area up to the edge. Then apply another layer of resin with brush on top of fiberglass mat, being sure to saturate thoroughly.
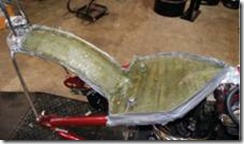
Repeat step 4 several times, until minimum thickness reaches 1/8” to ¼”. Then let it harden.
Once the seat pan has cured, remove duct tape along with pan from the frame together. Make sure to be careful not to break or damage the pan. Now, remove duct tape from pan and test fit. As you can see, we fiberglassed a mount into the pan. This is optional for your application.
Use a Sharpie to trace out your seat pan in order to be trimmed.
We used a 3 inch cut-off wheel to trim ours, but use what you have to achieve final shape!
THEN…get covered by your favorite upholstery guy.
(Stewart’s Custom Upholstery – www. kustomrodinteriorsbystew.com)


![clip_image002[5] clip_image002[5]](https://cyclesource.com/wp-content/uploads/2013/11/clip_image0025_thumb1.jpg)
![clip_image002[7] clip_image002[7]](https://cyclesource.com/wp-content/uploads/2013/11/clip_image0027_thumb1.jpg)


![clip_image002[11] clip_image002[11]](https://cyclesource.com/wp-content/uploads/2013/11/clip_image00211_thumb1.jpg)
![clip_image002[19] clip_image002[19]](https://cyclesource.com/wp-content/uploads/2013/11/clip_image00219_thumb.jpg)
![clip_image002[23] clip_image002[23]](https://cyclesource.com/wp-content/uploads/2013/11/clip_image00223_thumb.jpg)
![clip_image002[25] clip_image002[25]](https://cyclesource.com/wp-content/uploads/2013/11/clip_image00225_thumb.jpg)
![clip_image002[29] clip_image002[29]](https://cyclesource.com/wp-content/uploads/2013/11/clip_image00229_thumb.jpg)
![clip_image002[31] clip_image002[31]](https://cyclesource.com/wp-content/uploads/2013/11/clip_image00231_thumb.jpg)


